If you’re running a small to mid-sized manufacturing operation that uses a mobile tunnel kiln for firing ceramics, bricks, or calcining minerals, you know that proper drying is make-or-break. Skip this step, and you’ll end up with cracked, warped, or even completely ruined finished products—wasting raw materials, time, and money. As someone who’s spent over a decade supplying mobile tunnel kilns and troubleshooting their day-to-day use with clients, I’ve seen firsthand how many operators underestimate the drying process. They assume cranking up the kiln’s heat will do the trick, but that’s a fast track to disaster. Mobile tunnel kilns are designed for mobility and consistent, controlled heating, but drying material inside them requires a specific, methodical approach that balances temperature, air flow, and time. In this post, I’ll break down exactly how to dry material in a mobile tunnel kiln, drawing on the lessons I’ve learned from working with hundreds of operators across industries. Mobile Tunnel Kiln
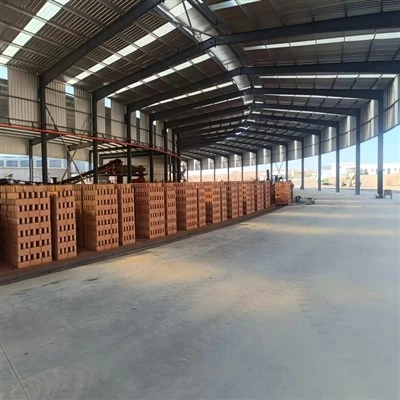
First, let’s get clear on why drying is non-negotiable for mobile tunnel kiln operations. When raw material—whether clay for pottery, shale for bricks, or powdered ore for calcining—leaves the mixer or extruder, it has a moisture content usually between 15% and 25%, depending on the material type. If you stick this wet material straight into a hot kiln, the water inside it heats up and expands rapidly, creating pressure that forces the material to crack. For mobile tunnel kilns, which move material on carts through a series of temperature zones, that risk is amplified. The kiln’s mobility means it can be set up on-site close to raw material sources, but that also means operators often rush the process to meet tight deadlines. I once worked with a small brick maker in Ohio who lost three full batches of clay bricks because he loaded wet material into the kiln too early. He cranked the temperature to 180°C (350°F) in the first zone, assuming that would dry the bricks fast, but the rapid water expansion caused 70% of them to split before they even reached the firing zone. That mistake cost him over $12,000 in materials and missed a delivery date to a local housing developer. The core issue here is that drying isn’t just about removing water—it’s about doing it slowly enough to let moisture escape evenly from every particle of the material, no matter its shape or thickness.
The first step to successful drying in a mobile tunnel kiln is prepping the material correctly before it ever enters the kiln. This might sound like a separate step, but it’s the foundation of good drying. I always tell clients to shape raw material into uniform pieces first. If you’re making bricks, for example, make sure every brick is the same size and thickness—even a 10% difference in thickness can lead to uneven drying, with thicker parts holding moisture long after thinner ones are dry. For ceramics, avoid lopsided pieces that have thick corners or hollow sections that trap moisture. Another key prep step is conditioning the material to a consistent initial moisture content. Don’t mix wet and dry batches together randomly; use a moisture meter to check that every load is within 1% of the target, which is usually around 12% to 15% for most materials. I once had a client producing refractory bricks who skipped this step, loading a batch where some bricks had 18% moisture and others had 12%. The 18% bricks took twice as long to dry, and when the kiln reached the next zone, those under-dried bricks cracked while the already dry ones were over-exposed to heat. Prep work might add 15 to 30 minutes to your process, but it cuts drying time in half and reduces waste by at least 80%.
Once the material is prepped and loaded onto kiln carts, the next critical step is setting up the drying zone within the mobile tunnel kiln. Unlike fixed tunnel kilns, which are installed in a permanent building, mobile tunnel kilns are modular and can be adjusted for site-specific conditions, which is a huge advantage for drying. The drying zone is the first section of the kiln, before the preheating and firing zones, and it needs three core components: controlled temperature, consistent air flow, and enough residence time. Let’s start with temperature. For most materials, the drying zone temperature should start low—between 40°C (104°F) and 80°C (176°F)—and increase gradually as material moves through the zone. I advise clients to set the first third of the drying zone to 40°C, the middle third to 60°C, and the final third to 80°C. This gradient prevents sudden temperature spikes that cause water to flash off. If you’re working with denser materials, like raw shale bricks, you can bump the final drying zone up to 90°C (194°F), but never go higher than that. For porous materials, like earthenware clay, stick to the lower end of that range—higher temperatures can cause the surface to crust over, trapping moisture inside the material.
Air flow is even more important than temperature for drying in a mobile tunnel kiln. Mobile kilns are built with adjustable exhaust and intake fans, and getting the balance right here makes all the difference. The goal is to pull moist air out of the drying zone as new, dry air flows in, so moisture is removed from the material instead of recirculating. Too little air flow, and moist air gets trapped, slowing drying down and increasing the risk of mold or uneven drying. Too much air flow, and you can blow small, lightweight pieces—like ceramic cups or powdered ore pellets—off the carts, wasting material. I usually recommend setting the fan speed to pull 10 to 15 cubic meters of air per minute for every square meter of cart space in the drying zone. For small batch kilns (those that handle 5 to 10 carts per charge), that translates to a fan speed of 1,500 to 2,000 CFM, while larger industrial kilns (20+ carts per charge) need 3,000 to 5,000 CFM. Another trick I share with clients is to direct the intake air at the top and bottom of the material pieces, not just the surface. For flat items like bricks, that means setting air deflectors above and below the cart to blow air through the gaps between pieces, not just over the top. For hollow ceramic pieces, point a small fan nozzle at the opening to pull moisture out from the inside.
Residence time in the drying zone is the third key variable, and it’s tied directly to the thickness and density of your material. Mobile tunnel kilns move carts at a consistent speed, so you’ll need to calculate how long each cart stays in the drying zone based on your material. For thin, porous materials like earthenware tiles (1 cm thick), the drying zone needs a residence time of 4 to 6 hours. For medium-density materials like standard bricks (5 cm thick), that jumps to 8 to 12 hours. For dense, thick materials like refractory bricks (10 cm or more), you’ll need 18 to 24 hours in the drying zone. I’ve seen clients make the mistake of rushing this step to meet production goals. A concrete pipe manufacturer I worked with in Texas tried to cut drying time for 20 cm thick concrete pipes from 24 hours to 12, and 60% of the pipes cracked during firing. When I checked, his kiln’s drying zone had the right temperature and air flow, but the carts moved too fast, so the pipes didn’t have time for moisture to escape. The fix was simple: adjust the kiln’s cart speed from 0.8 meters per hour to 0.4 meters per hour, doubling residence time, and the cracking rate dropped to less than 1%. If you’re not sure what residence time you need, do a small test run: load a few sample pieces of your material, track how long it takes for their moisture content to drop to 2% (the level needed for firing), then multiply that time by 1.5 to be safe—small variations in material can throw off the timeline.
Once the material is in the drying zone, there are a few routine checks and adjustments you can make to ensure success. First, monitor the moisture content of the material as it exits the drying zone. Use a portable moisture meter to test 5 to 10 pieces from each cart, making sure the average moisture content is between 1% and 3%—any higher than that, and you risk cracking in the preheating zone, any lower than that, and you’re wasting energy by over-drying the material. For mobile tunnel kilns, which are designed to be operated by on-site teams, I always recommend keeping a log of drying zone temperature, air flow speed, and cart speed for each production run. Over time, that log will help you fine-tune the process for your specific material, so you can avoid trial and error. Another common issue in mobile kilns is air leaks, especially around the cart edges or the kiln’s sectional joints. Leaks mean you’re losing the dry air you worked so hard to get, slowing drying and increasing energy costs. Do a monthly air leak test by closing the kiln’s exhaust fans and watching to see if the pressure in the drying zone drops too fast—if it does, seal the gaps with ceramic fiber tape, which is easy to apply on-site and perfect for mobile kilns’ modular design.
If you’re working with specialty materials, like glazes or delicate ceramic art, you’ll need to adjust the drying process even more. For glazed pieces, especially those with a thin glaze layer, the surface dries faster than the inside, creating a tension that can cause the glaze to crack. To fix this, add a holding period in the drying zone: after the material reaches the target moisture content, hold it at a steady 60°C for 2 hours before moving it to the preheating zone. That gives the inner moisture time to catch up, reducing glaze cracking by 90%. For delicate items, like small ceramic figurines, use a lower air flow speed (5 to 8 cubic meters per minute per square meter) to avoid damaging the pieces. Mobile tunnel kilns are ideal for these specialty runs because they can be scaled up or down easily—you don’t need to commit to a huge fixed kiln for small batch art production.
Now, let’s talk about how this process ties into the advantages of mobile tunnel kilns, specifically for drying. Unlike fixed kilns, which are stuck in one location, mobile kilns can be set up near raw material sources, so you don’t have to move wet material long distances, which can cause it to dry unevenly before it even reaches the kiln. They’re also easier to adjust for different materials—if you’re switching from drying bricks to drying ceramic tiles, you can reconfigure the drying zone’s air deflectors in a few hours, compared to days or weeks of modifications for a fixed kiln. That flexibility is why so many small to mid-sized operations are switching to mobile tunnel kilns, but it also means operators need to adapt their drying process to the kiln’s modular design. I always tell new clients that the drying zone is the most important part of the mobile kiln to customize—spend time getting temperature gradients, air flow, and residence time right, and the rest of the firing process will go smoothly.
Of course, even with the best process, you might run into issues. The most common drying problems in mobile tunnel kilns are uneven drying, cracked material, and slow drying times. If you’re seeing uneven drying, check that your material is uniform in size, your air flow is consistent across the entire cart, and there are no air leaks in the drying zone. If you’re getting cracked material, the issue is almost always either temperature that’s too high too fast, or residence time that’s too short. For slow drying, double-check your air flow—low fan speed is the #1 cause of slow drying in mobile kilns, since their modular design can sometimes lead to lower air pressure than fixed kilns. I once worked with a lime manufacturer in Tennessee who had slow drying times for powdered lime; we discovered their fan was set to half speed because they were worried about energy costs, but increasing it to full speed cut drying time in half and reduced energy use per batch by 15%, because they didn’t have to run the kiln as long.
At the end of the day, drying material in a mobile tunnel kiln isn’t rocket science, but it requires attention to detail and an understanding of how your specific material and kiln work. The biggest mistake I see operators make is treating drying as an afterthought, a step that can be rushed to save time. But as I’ve learned from years in this industry, the time you spend on proper drying pays off in fewer ruined batches, lower costs, and more consistent finished products. If you’re looking to invest in a mobile tunnel kiln, or if you’re looking to improve your drying process with the equipment you already have, remember that the right drying zone setup is non-negotiable.
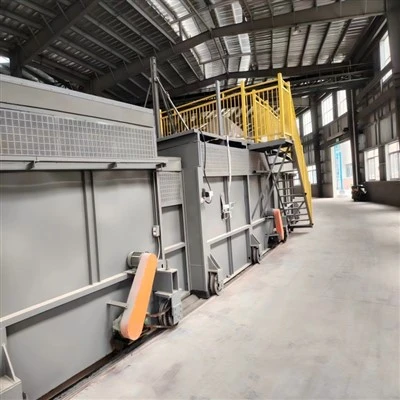
If you’re ready to streamline your drying and firing process with a mobile tunnel kiln tailored to your operation, get in touch to discuss your needs. Whether you’re producing bricks, ceramics, minerals, or another material, we can work with you to design a kiln that fits your production goals and drying requirements, with guidance from our team of experts who have decades of experience in the industry. Don’t let uneven drying or ruined batches hold your operation back—reach out to start a conversation about how we can help you succeed.
Industrial Kiln References
- American Ceramic Society. (2020). Industrial Kilns and Drying Processes for Ceramics and Refractories. Wiley.
- Smith, J. (2019). Mobile Industrial Kilns: Design, Operation, and Maintenance. Industrial Press.
- International Society for Rock Mechanics and Rock Engineering. (2021). Drying Processes for Mineral and Construction Materials. Elsevier.
- National Institute of Standards and Technology. (2018). Moisture Control in Industrial Firing Processes. NIST Technical Note 1927.
Henan Yaxin Kiln Co., Ltd.
Henan Yaxin Kiln Co., Ltd. is one of the most professional mobile tunnel kiln manufacturers and suppliers in China. With abundant experience, we warmly welcome you to buy high quality mobile tunnel kiln with the latest design from our factory. Good service and punctual delivery are available.
Address: Jixian Industrial Zone, Shangqiu City, Henan Province
E-mail: 1543563178@qq.com
WebSite: https://www.hnyxkiln.com/
